Building Tips for Making the Models
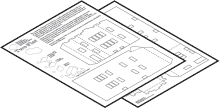 |
Print the pages of the PDF file on cardstock or heavy paper. | ||
 |
Color the pieces on the page with markers, colored pencils, or any other media you'd like. Or just leave them uncolored. | ||
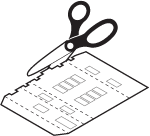 |
Cut out the pieces along the outline edges with a scissors or hobby knife. | ||
 |
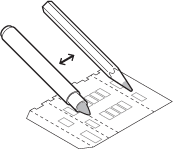
Fold the pieces on the dotted lines. For easier and more-precise folds, score the fold line first. Place a ruler along the dotted line and run a butter knife or other dull point down the fold (adjust the position of the ruler to score directly on the dotted line). Crease the folded paper carefully with your fingernail or the back of a spoon to make a crisp edge. | ||
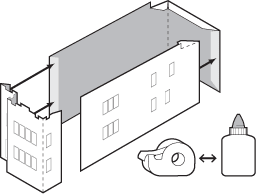 |
Attach the pieces of the model together with office tape or white glue. Glue is generally more durable and easier for assembling the small pieces, but tape can be used if you'd like to build the house quickly. | ||
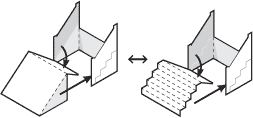 |
The stair pieces can be put together as an angled stair (simpler), or as folded steps (a lot more challenging). Score the steps carefully as described in Tip #4 above to fold them straight and even. Glue the edges of the folded piece inside the stair sides. | ||
Extras Details for the Models
- Shop at a hobby store for HO-scale model railroad accessories such as small cars, miniature people, fences, mailboxes, etc. to add detail to your house model.
- Search outdoors for twigs which look like miniature trees. Glue green paper or green flocking to the branches to represent foliage. Place the model to a sturdy cardboard or wood base. Add trees and landscaping around it.
- Cut out the window openings of the building before folding. Glue translucent paper behind the opening. Place an LED tea light inside the completed building.
Advanced Model-Making Possibilities
- Print the PDF at 54.375% to shrink the houses to N-Scale (1:160) for a more-challenging project.
- Print the pages on colored paper to make houses in different colors. Or print the roof on one color paper and the walls on a different color.
- Open the PDF in a drawing program and add color to the walls digitally before printing.
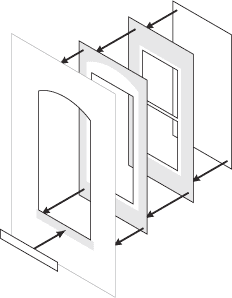
- To make a more three-dimensional wall, print multiple copies of the wall pieces. Cut out the window and door openings from one wall. On a second piece, cut out the interior openings. On a third piece, cut out openings for the window panes. Glue the frame pieces to the interior of the wall, then glue a piece of clear plastic and/or tissue paper behind the window frame. Cut out the window sill and glue on the exterior of the wall: